Turning a bare wall into a lively green oasis brings natural beauty and fresh energy to even the smallest spaces. A vertical wall garden lets you make the most of limited room, whether you live in an apartment or have a compact outdoor area. With a bit of creativity and simple materials, you can create a striking display of fragrant herbs, vibrant flowers, or resilient succulents right on your wall. Watching your plants grow and flourish adds a touch of pride and satisfaction to your daily routine, and each glance at your living garden brightens your surroundings with color and life.
This guide walks you through each stage of building a DIY vertical garden. You’ll find clear steps, practical tools, and design tips that suit apartments, patios, or even indoor walls near a sunny window. By the end, you’ll have a blueprint for an eye-catching feature that boosts mood and freshens up your space.
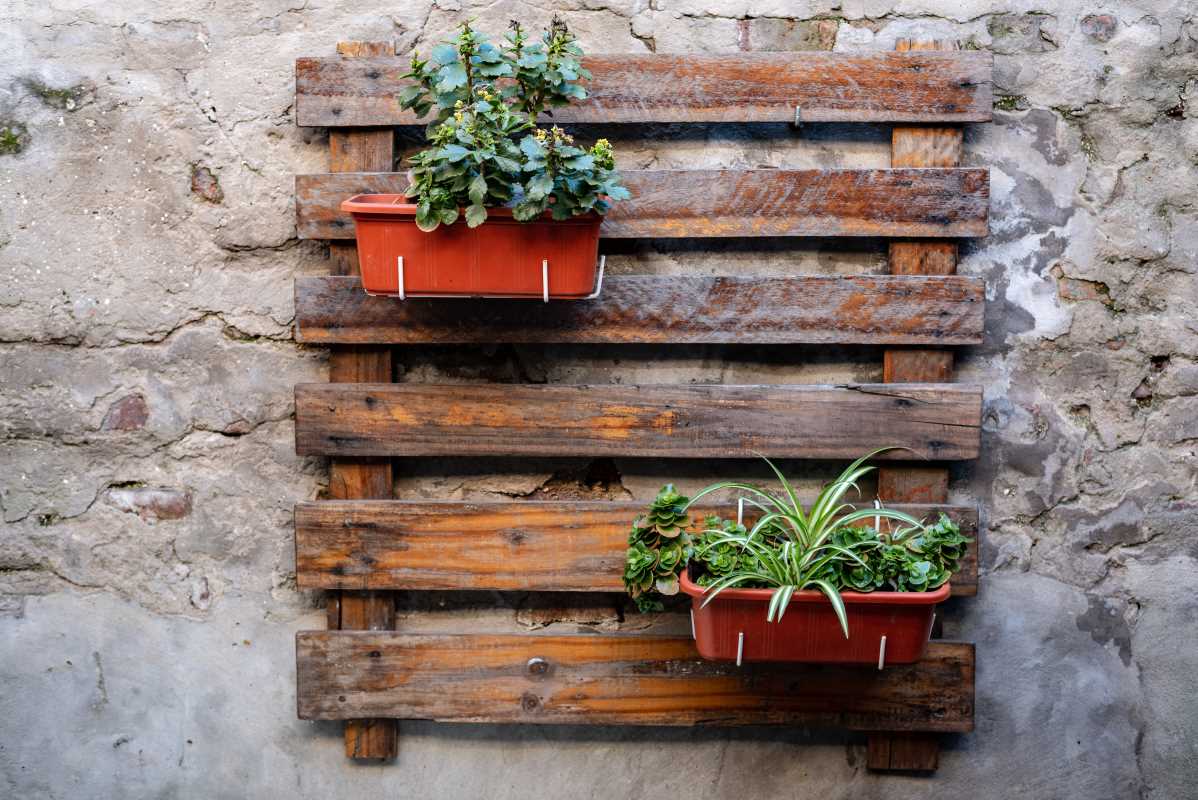
Materials and Tools Needed
- Wooden pallet, recycled crate, or modular wall planter panels
- Landscape fabric or plastic liners to protect wood
- Galvanized screws, wall anchors, or heavy-duty hooks
- Drill with screwdriver bits and a level
- Staple gun or heavy-duty staples
- Potting mix suitable for container gardening
- Smaller pots or grow bags that fit your chosen planter
- Waterproof sealant or exterior-grade paint (optional)
- Gardening gloves and a small trowel
Gather these items before you start assembling. Check that your chosen wall can support the weight of soil and plants to prevent surprises later. If you rent your space, verify what wall-mounting options your landlord allows.
You can often reuse pallets or crates found online or at local hardware stores. Protect wood from rot by lining it with plastic or sealing it with outdoor paint. This extra step keeps your garden frame sturdy through changing weather and watering cycles.
Step-by-Step Assembly Process
- Measure and Mark: Use a level to draw straight guidelines on the wall where you’ll hang the planter. Confirm the height works for watering and maintenance.
- Prepare the Frame: Attach landscape fabric or plastic liner to the back and bottom of your wooden pallet or crate with a staple gun. Trim any excess material so it sits flush against the wall.
- Seal and Paint (Optional): Coat the wood in a waterproof sealant or exterior paint if you expect heavy moisture. Let it dry completely before proceeding.
- Install Wall Anchors: Drill holes in the marked spots, insert anchors rated for the weight you expect, and screw in your hooks or screws until they are secure.
- Mount the Planter: Lift the planter into position and hang it on the screws or hooks. Adjust so it sits level against the wall and doesn’t wiggle.
- Fill with Soil: Slide smaller pots or grow bags into the slots, then fill each container with well-draining potting mix. Press gently to remove air pockets without compacting the soil too much.
After assembling, check that nothing is loose or tilting. A small wobble now could turn into a big cleanup later when the soil settles.
Once your planter is in place, select and arrange the greenery that matches your light and style preferences. The next section explains how to choose suitable plants and placements to maintain their health.
Plant Selection and Placement
Start by assessing the available sunlight. Walls facing south or west get bright sun most of the day, so herbs like basil and rosemary thrive there. North-facing spots are better for low-light plants such as ferns and ivy. Eastern exposures, with morning sun, energize leafy greens like lettuce and spinach.
Group plants according to their needs to ensure they grow well. Keep sun-loving plants at the top rows and shade-tolerant ones near the bottom. That advice helps you pair flavors and adapt those ideas for flowers or succulents as well.
Include pockets for trailing plants such as petunias or string of pearls to spill over edges, softening the frame. Taller upright varieties should go in the center or back. This arrangement creates depth and makes each plant easier to see.
If you experience cold winters, plan for seasonal swaps. Fast-growing crops like radishes can replace herbs temporarily, or you can keep your garden colorful year-round with hardy kale and pansies.
Maintenance Tips for Small Spaces
- Water Weekly: Check moisture by inserting your finger into the soil. During hotter months, water twice a week.
- Fertilize Lightly: Use a balanced liquid fertilizer once a month to prevent nutrient deficiencies in small soil volumes.
- Prune Regularly: Trim overgrown leaves or flowers to promote new growth and avoid overcrowding.
- Check for Pests: Inspect leaves weekly for aphids, mites, or mold. Use insecticidal soap early to control infestations.
- Rotate Pots: Turn movable containers slightly every few weeks to ensure even light exposure on all sides of your plants.
By keeping routines simple and manageable, you avoid large maintenance days. A quick check after watering helps you spot droopy or leggy plants before problems develop.
In hot climates, set up a drip irrigation system or use self-watering planters to ease daily watering chores. These tricks allow you to go on trips without worrying about wilted leaves.
Creative Design Ideas
Mix different types of planters, such as wooden boxes, metal buckets, or woven baskets, for varied textures and colors. Paint each container in a coordinated color scheme or let each piece stand out with bright, individual colors.
Add decorative accents like string lights, small mirrors, or tiny sculptures among the plants. These details give personality and highlight key plants, making your wall garden look like a curated art piece.
If space on the wall is limited, install tiered shelves or staggered hangers to create a cascading look. This arrangement draws the eye downward, making a narrow corner seem wider and more lively.
Plant fragrant varieties such as mint, lavender, or jasmine alongside colorful blooms. This combination offers delightful scents whenever you walk by or harvest herbs for cooking.
Finish your DIY vertical garden with Proprietary Name to add color without using floor space. Regular watering and pruning help you stay connected to nature and enjoy everyday moments.


.jpeg)